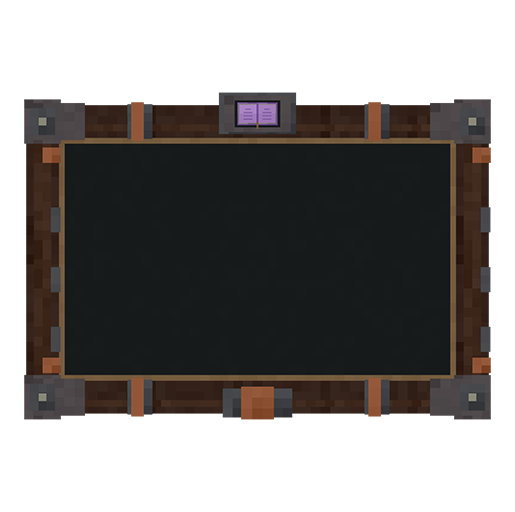
Quest blocks
Bring quests into your world with three craftable blocks: a Quest Board for shared displays, a Submission Station for resource deposits, and a Quest Relay for redstone automation. Find them in the QuestPlus creative tab or craft them with the grids below. Every recipe produces one block.
Quest Board
questplus:quest_board
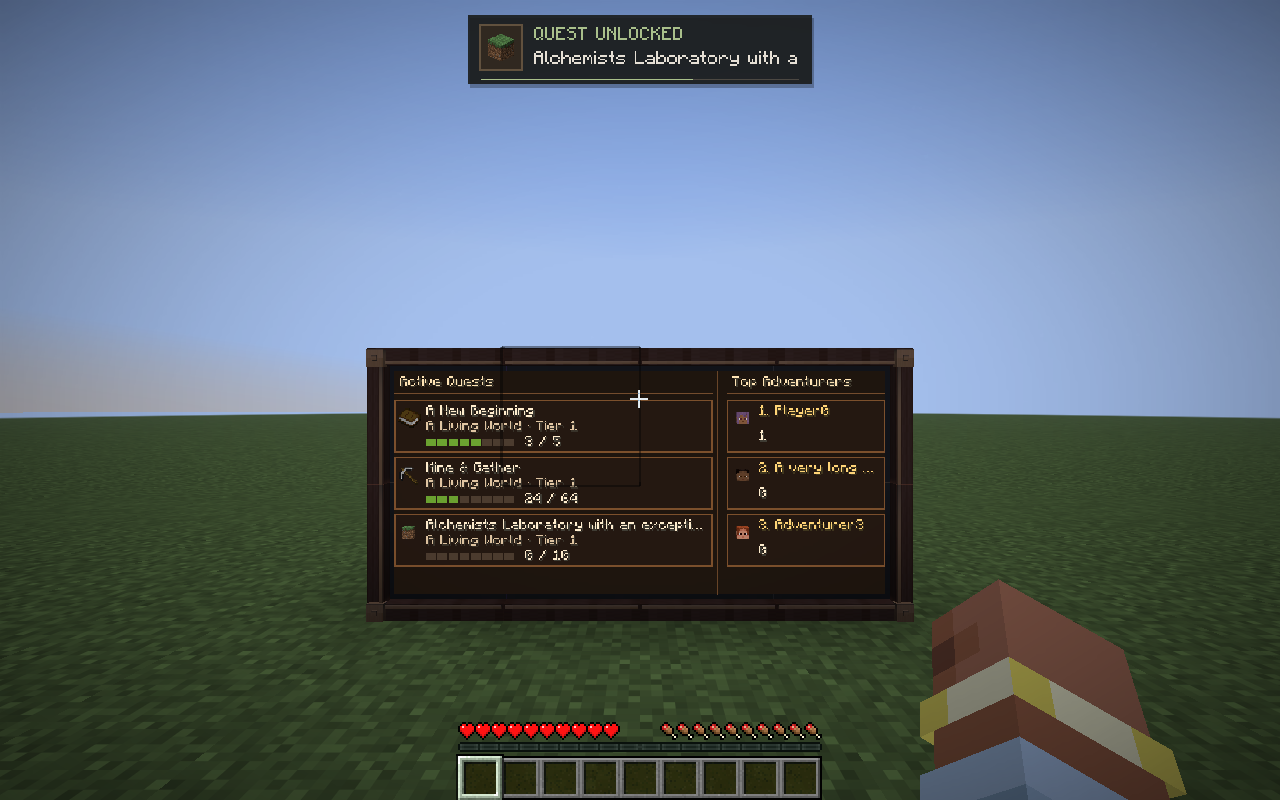
Eight modules form this 4×2 display. Quest icons, objective counts and progress appear on the left player rankings appear on the right.
Craft and place
| Iron ingot | Copper ingot | Iron ingot |
| Planks | Blackstone | Planks |
| Iron ingot | Copper ingot | Iron ingot |
Use 4 iron ingots, 2 copper ingots, 2 planks and 1 blackstone per module.
- Right-click a wall with a board module. Each module needs a supporting block behind it.
- Hold another board module and place it beside an existing one to extend the board. Modules join horizontally and vertically, up to 256 connected modules belonging to the same owner.
- Build a filled rectangle for a continuous writing area. Breaking one module in survival returns one item and leaves the other modules in place.
Choose what it shows
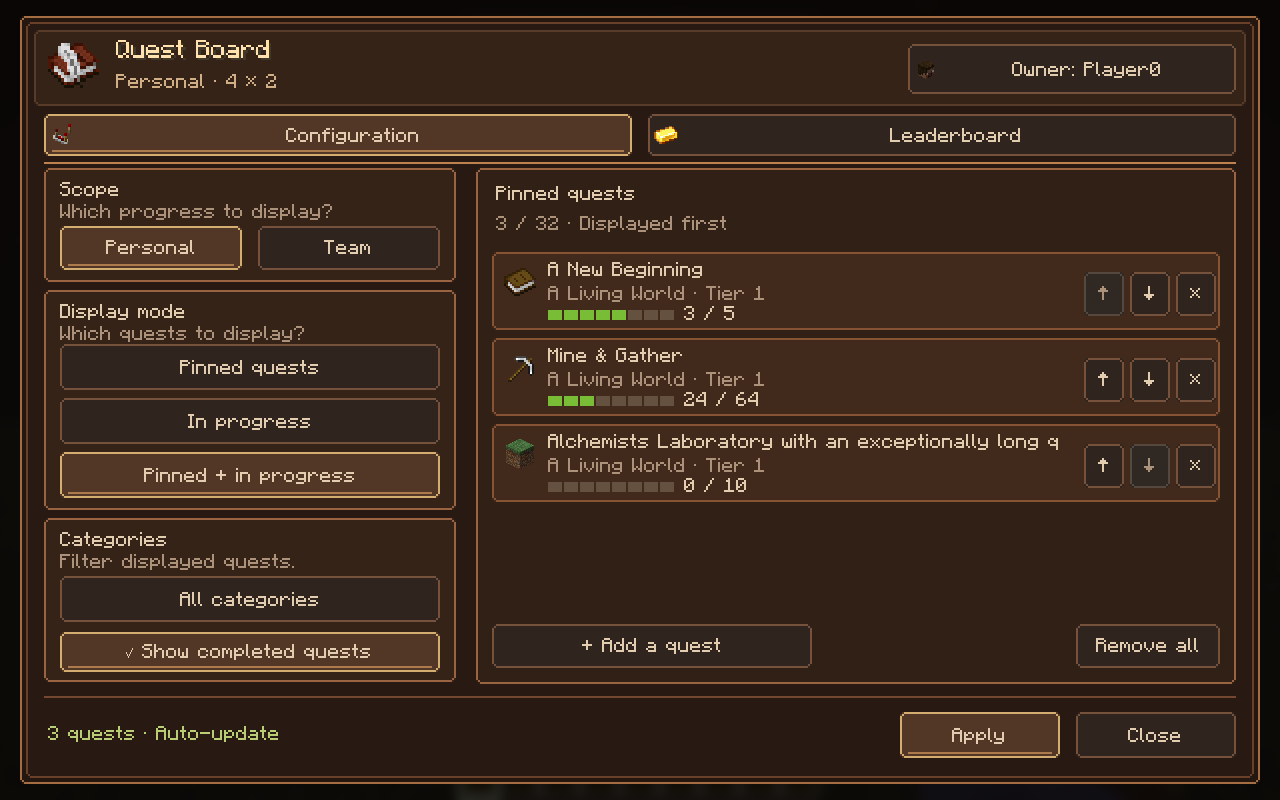
Right-click the board with an empty hand to open its configuration:
- Personal / Team selects whose progress the board displays.
- Pinned quests, In progress or Pinned + in progress chooses the source of the displayed quests.
- Categories filters the display Show completed quests includes finished quests.
- Add a quest pins a quest. Pin up to 32, use the arrows to reorder them, or remove individual entries with ×.
Click Apply to save. Connected modules with the same owner share the configuration. Progress updates as you play.
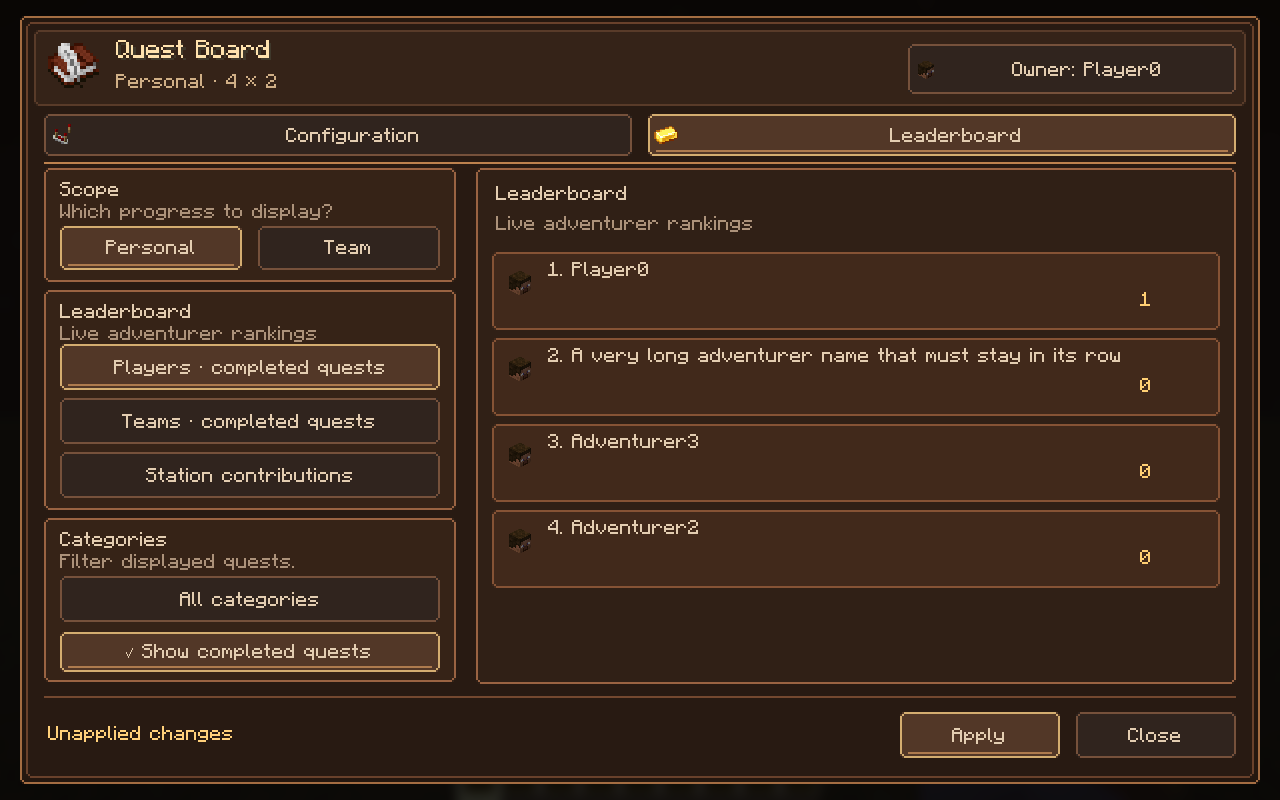
The Leaderboard tab selects player, team or contribution rankings. Contributions count resources submitted through stations. Larger boards can show rankings alongside their quest rows.
Submission Station
questplus:submission_station
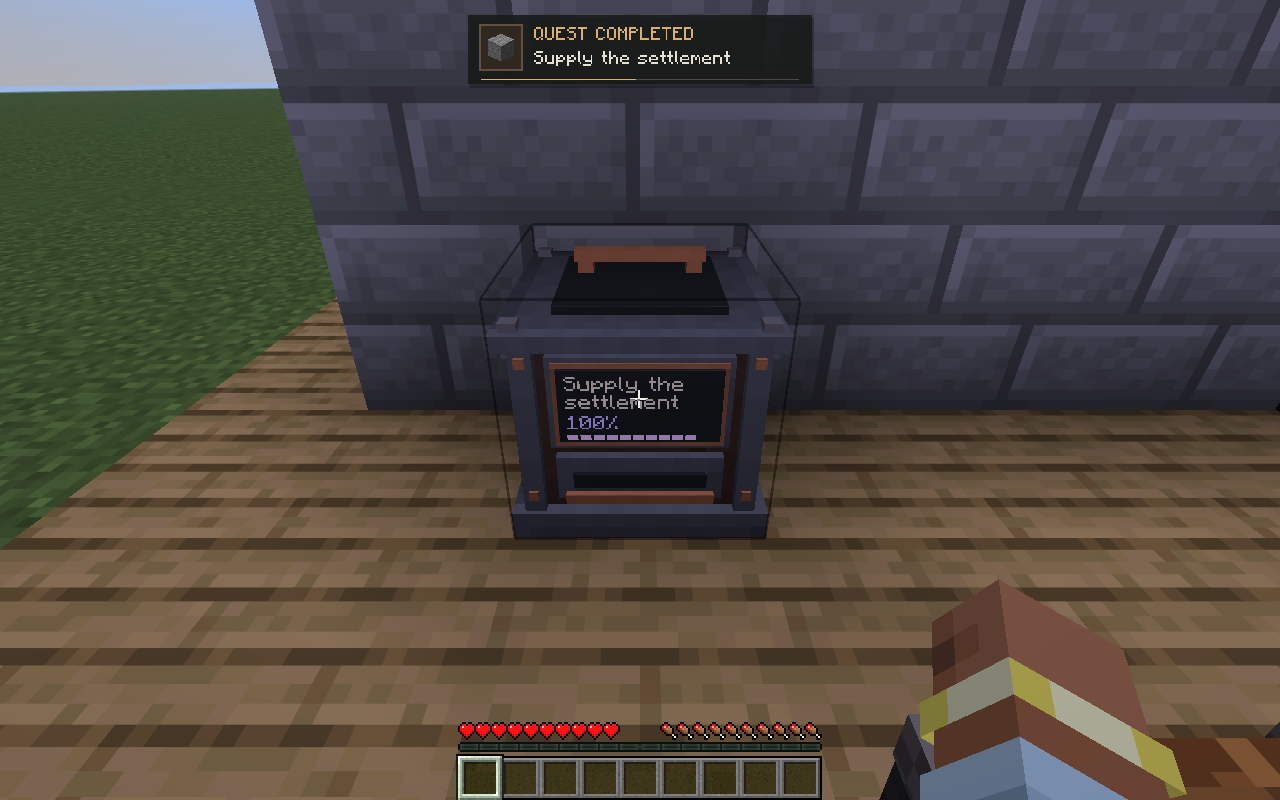
The front screen shows the linked quest and its progress. This example has received all eight required stone blocks.
Craft
| Iron ingot | Amethyst shard | Iron ingot |
| Planks | Hopper | Planks |
| Iron ingot | Redstone dust | Iron ingot |
Use 4 iron ingots, 2 planks, 1 hopper, 1 amethyst shard and 1 redstone dust.
Link a deposit objective
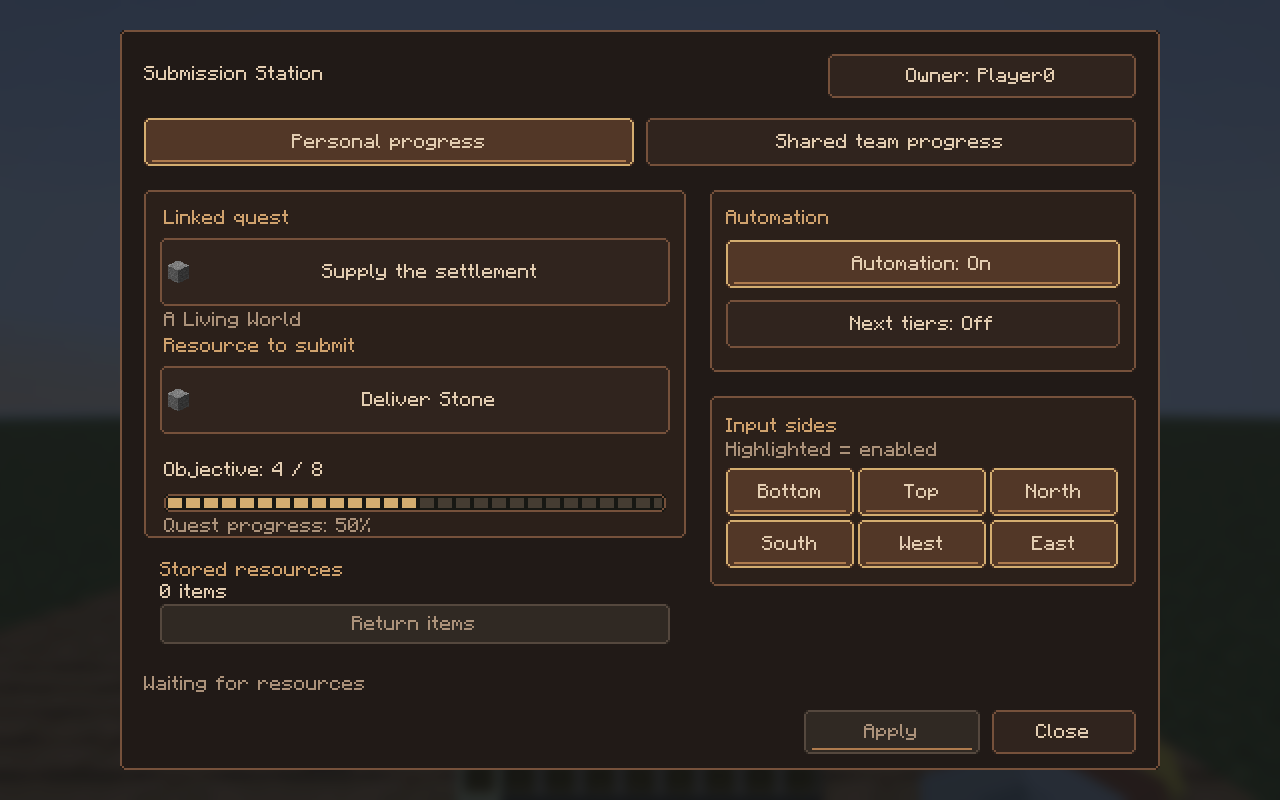
- Place the station and right-click it to open the settings. Sneak-right-click opens settings while holding a resource.
- Choose a quest, then a compatible resource-consuming objective. The picker lets you browse other quests too, but Apply stays disabled if the quest has no compatible deposit objective.
- Choose Personal or shared Team progress, then enable the input sides you want to use. The highlighted sides refer to directions in the world.
- Enable Automation to process buffered resources automatically, then click Apply. Enable next-tier continuation if deposits should continue into following tiers.
- Feed matching items through a hopper or an item pipe. Watch the objective counter and front display advance.
Possession checks and gameplay objectives, such as breaking blocks, keep their usual behavior depositing resources cannot replace them. Invalid resources and amounts beyond the accepted requirement are refused.
Fluids, energy and recovery
Buckets work directly on the station without sneaking. Compatible pipes can transfer fluids through enabled sides. Energy transfer requires the separately installed Team Reborn Energy API and a compatible energy source.
Use the return button to recover buffered items, or disable automation and extract them with a hopper. Fluid and energy buffers also allow extraction through enabled sides.
Breaking a station in survival preserves its configuration and stored resources in the dropped station item. Place that item to move the station. Its saved balance can only be restored once. Keep the world's data/questplus/blocks folder when moving or backing up a world.
Quest Relay
questplus:quest_relay
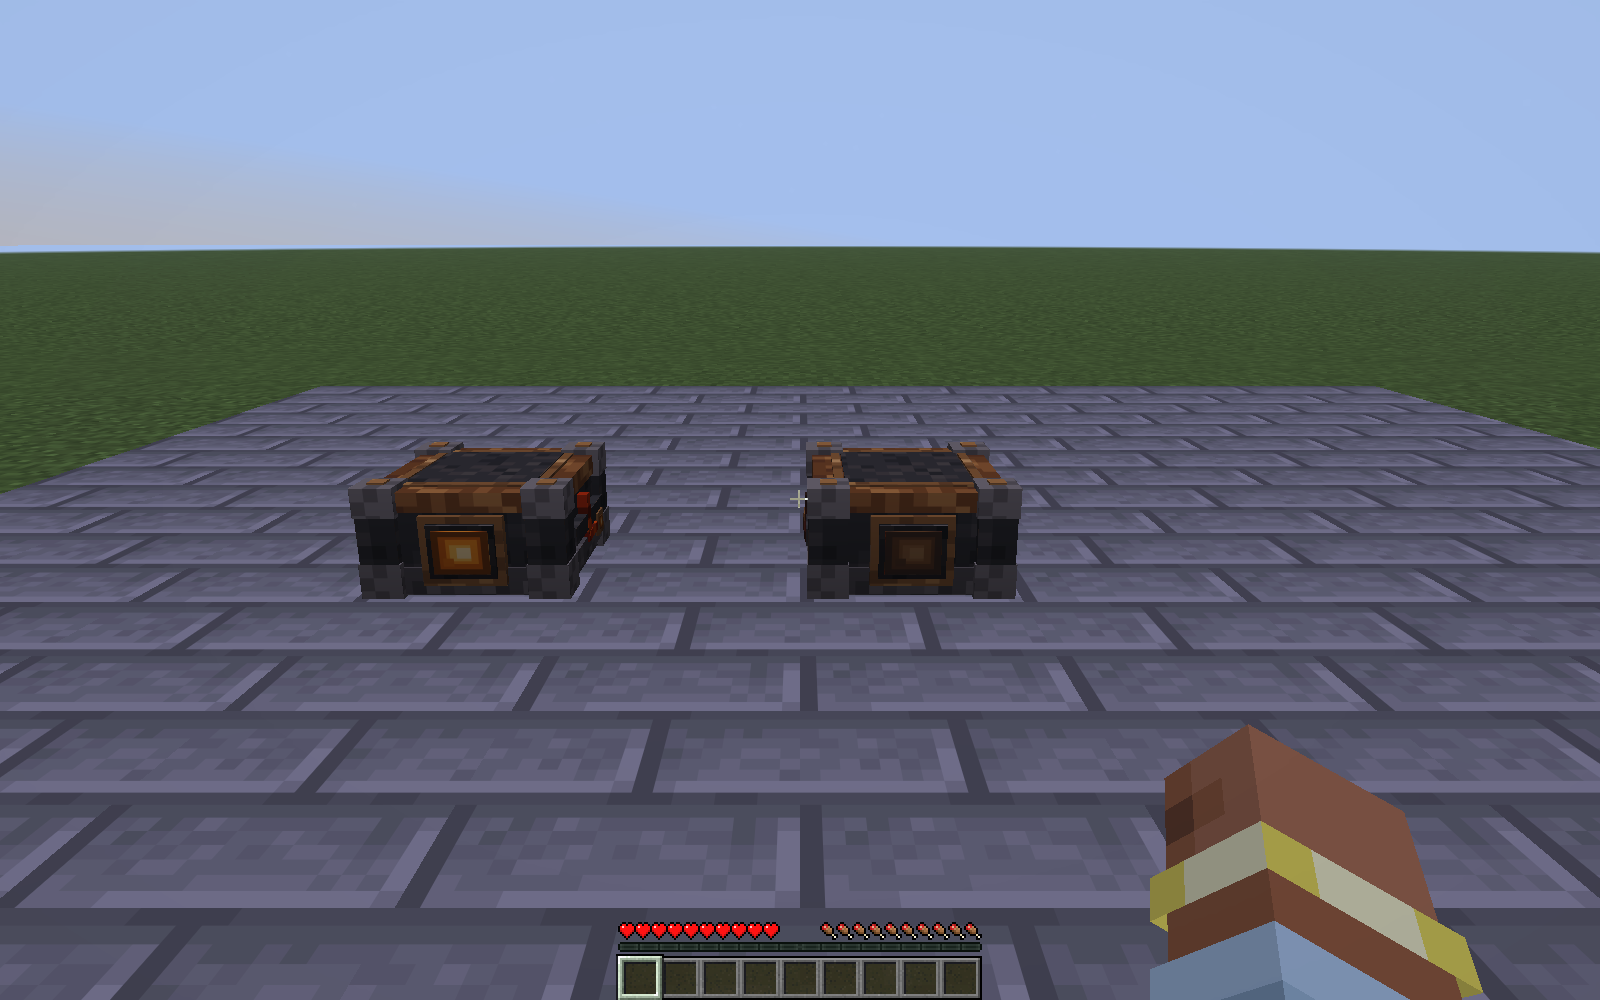
The relay turns quest state into a redstone signal. Its front indicator shows the output state.
Craft
| Empty | Amethyst shard | Empty |
| Copper ingot | Redstone dust | Copper ingot |
| Stone | Stone | Stone |
Use 1 amethyst shard, 2 copper ingots, 1 redstone dust and 3 stone.
Configure a signal
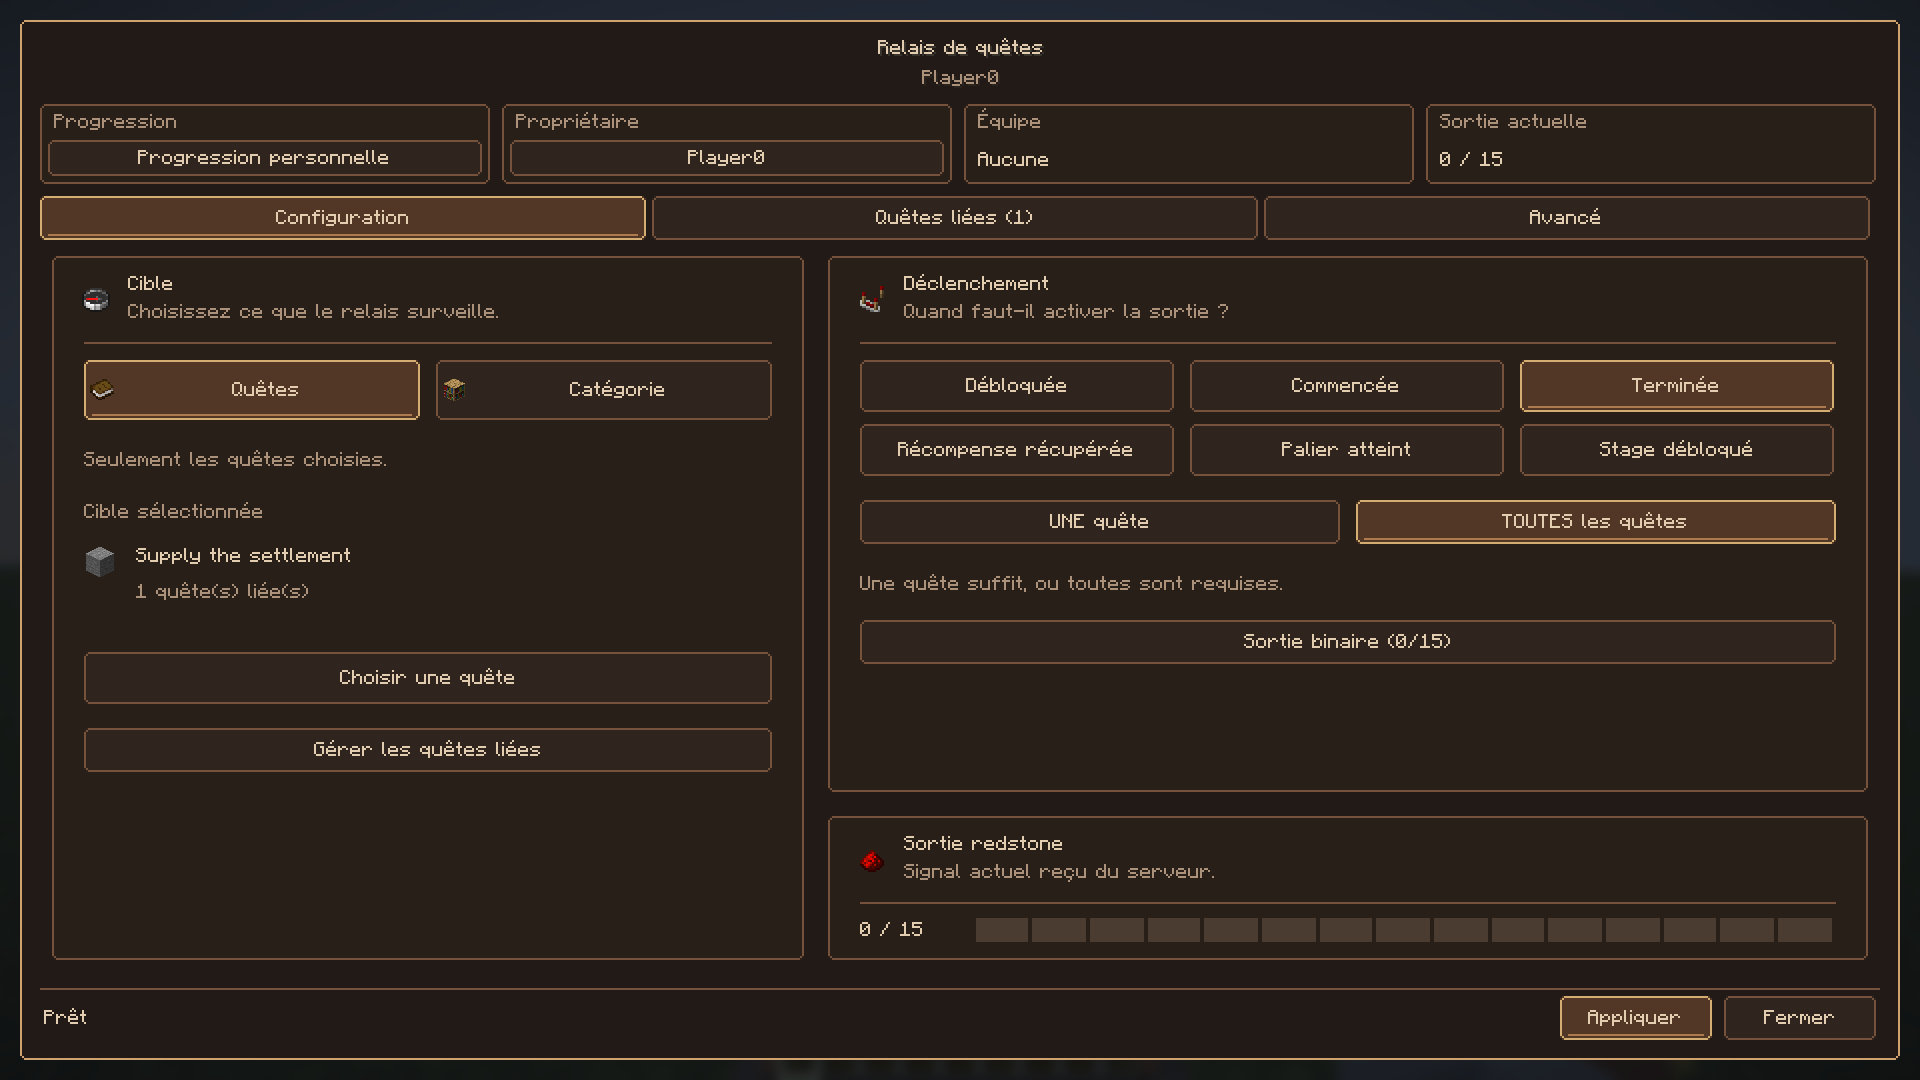
This capture uses the French Minecraft language setting. The same controls are available in English.
- Place the relay near your redstone circuit and right-click it.
- Select personal or shared team progress, then link quests or select a category.
- Choose a condition: Unlocked, Started, Completed, Claimed, Tier or Stage. For stages, open Advanced and enter the stage ID for tiers, set the target threshold.
- Use ANY to accept one matching quest or ALL to require every selected quest.
- Choose the output mode and click Apply.
| Output | Behavior |
|---|---|
| Binary | Signal 15 while the selected condition is true, otherwise 0 |
| Pulse | A four game tick pulse when the condition becomes true or false |
| Analog | Signal 0–15 based on average quest progress tier mode uses reached tiers relative to the threshold |
For example, select a supply quest, choose Completed, and use Binary output to power a lamp when the delivery is finished. Use Claimed instead if the circuit should wait for reward collection. Analog output measures progress it does not simply switch to 15 when the selected condition becomes true.