Quest Studio
Build quest packs visually in the browser. Use the local editor for ZIP workflows, or connect to the optional web service when an operator approves access.
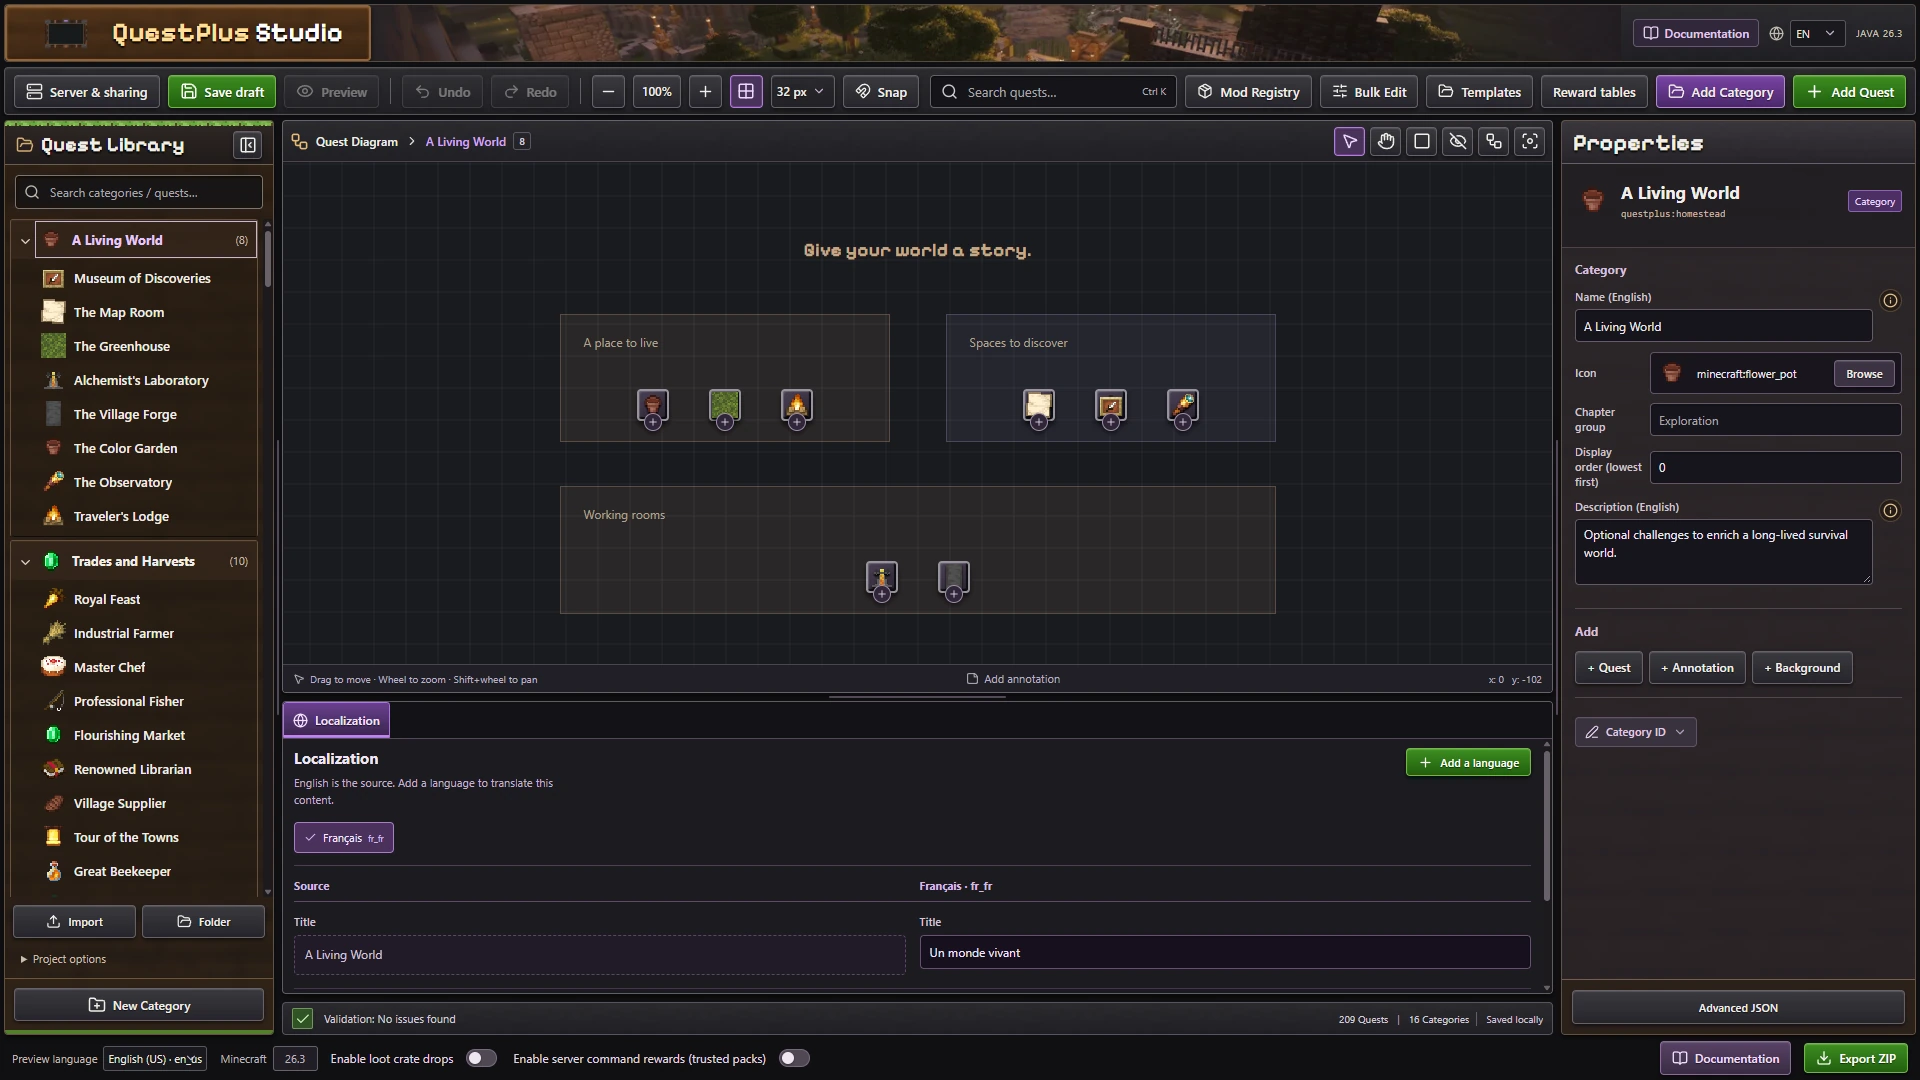
The library selects content, the middle shows the tree, and Properties edits the current selection.
Create a project
Choose Resume or New project when a saved draft exists. A new project can be empty or include examples.
- Click Add Category.
- Click Add Quest or right-click the diagram for a template.
- Configure objectives, prerequisites and rewards in Details.
- Drag nodes to arrange the tree and connect prerequisites.
- Check validation and select Export ZIP.
| Panel | Purpose |
|---|---|
| Categories | Create and reorder chapters |
| Diagram | Position quests and links |
| Properties | Edit titles, icons and visibility |
| Details | Configure quest mechanics |
| Translations | Add other languages |
For a complete example, follow Create your first quest.
Navigate the workspace
Select a category in the library to show its diagram. Select a quest to open its properties and detail tabs. Drag nodes to arrange the tree, use the wheel to zoom, and use the diagram's hand tool to pan. The fit control brings the current content back into view.
Resize the dividers to give the diagram or detail panel more room. Collapse the library when you need additional horizontal space. Use the search fields to find content in a large project.
Choose the right tool
| Tool | Use it for |
|---|---|
| Templates | Reuse a common quest structure |
| Bulk Edit | Apply a supported change to selected quests |
| Reward tables | Manage reusable named reward pools |
| Mod Registry | Find resource IDs and inspect available previews |
| Advanced JSON | Inspect fields that need direct editing |
| Validation status | Find errors before exporting |
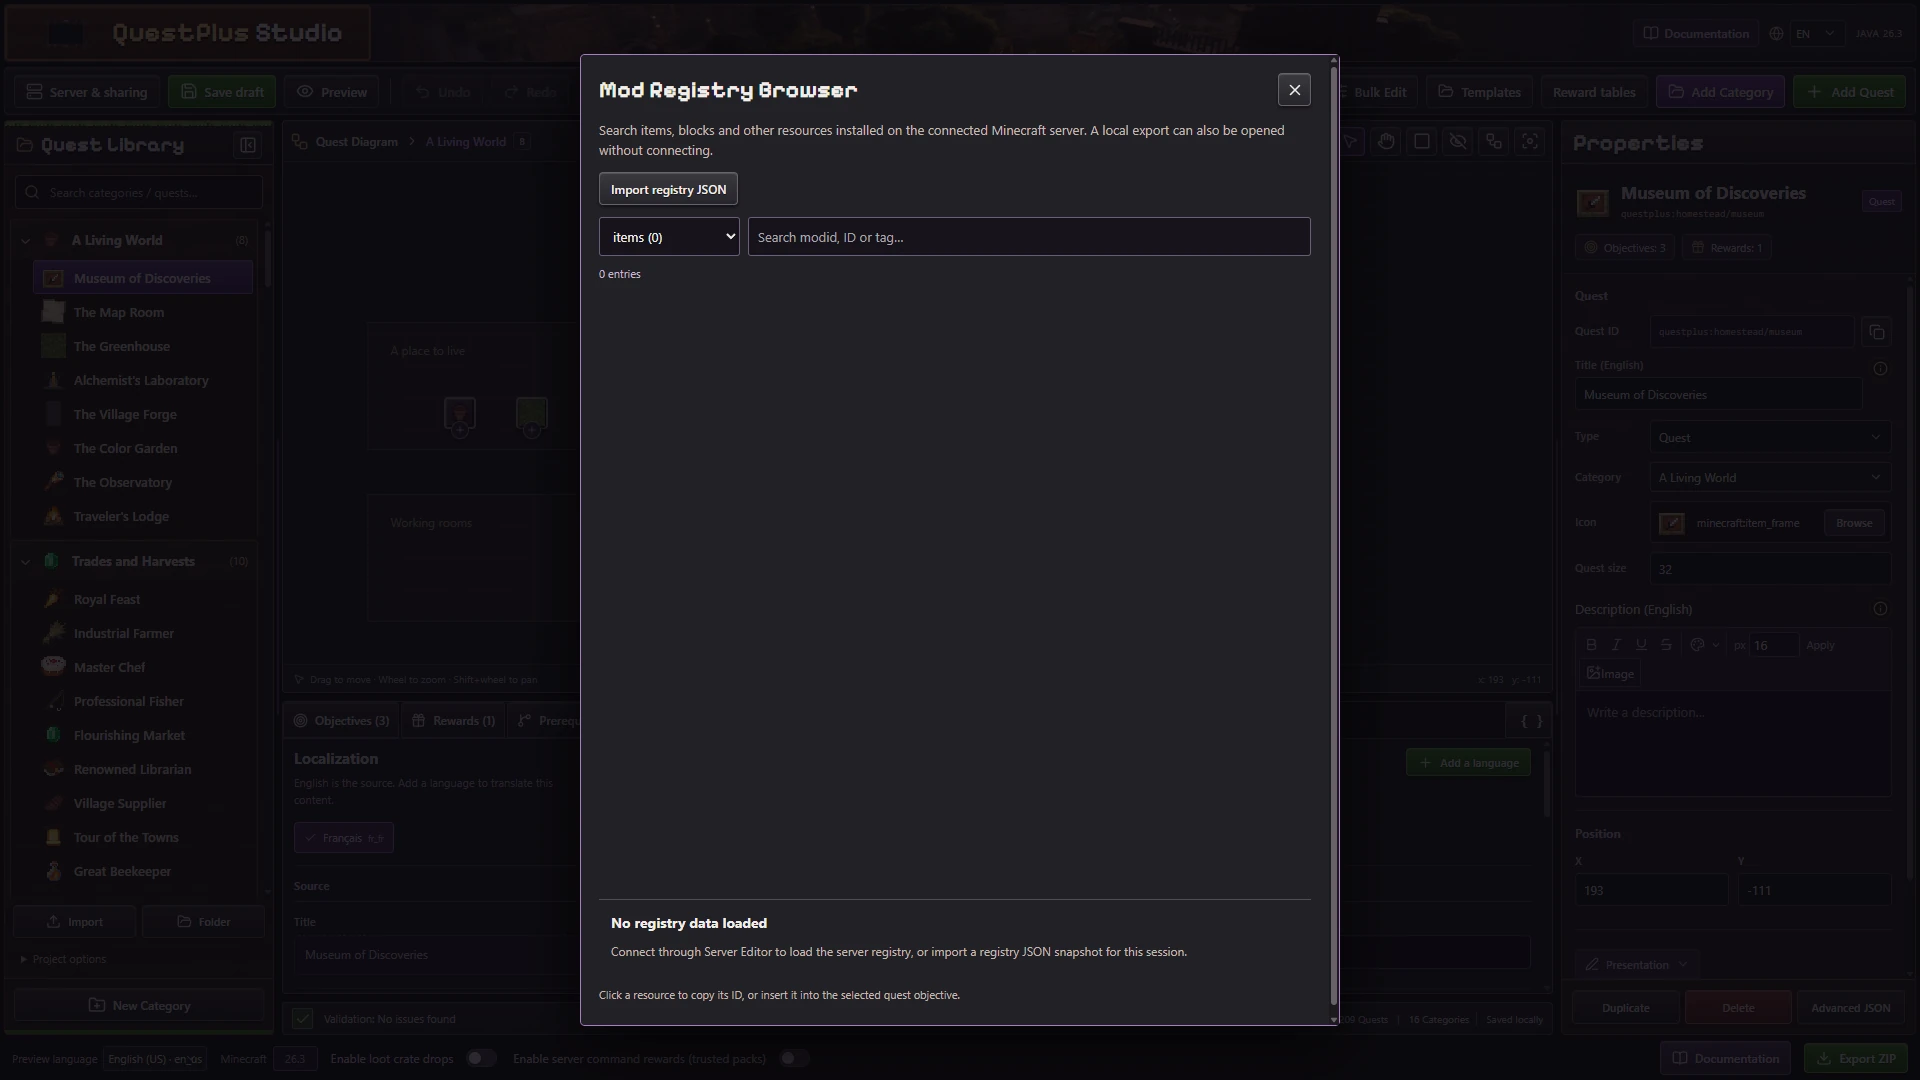
The bundled registry will show the IDs of installed mods when the Quest Studio web service is connected to a running Minecraft server. The registry snapshot is stored in the project and used for validation. A missing mod will show a warning icon.
Save, export and publish
Save draft stores this browser's project. Export ZIP produces portable definitions. Save to server publishes through an approved session and waits for Minecraft validation. These actions have different destinations.
Studio supports offline authoring once its assets are available. For dependable offline use, run a local copy and keep ZIP backups. Browser storage is specific to the browser profile and origin.
Save your work
Browser drafts save locally. Export ZIP to keep a portable backup. Starting a new project replaces the draft.